

Have you skipped the Introduction? Please go back and read it, it does contain useful information!
This chapter will demonstrate how to process example data using NDManager. More detailed information about customization options are provided in the following chapters.
The example data consists of three days of recordings (July 18-20, 2011). Each day, three sessions were run: baseline in home cage, run on a maze, and sleep. On July 20, there was even a fourth session where the animal explored a second maze. The recording setup used Spike2 acquisition software (CED, Cambridge, UK). Brain signals were sampled at 19531.25 Hz from 8 tetrodes (32 channels), and video was sampled at 25 Hz at 320x240 pixels.
Initially, the data files are located in three different directories:

Right-click a directory and select ->. This only works with a KDE file manager, but the same result can be achieved from a shell by typing:
ndm_prepare "July 18, 2011"This will start a graphical dialog where you can provide the information required to rename the files:
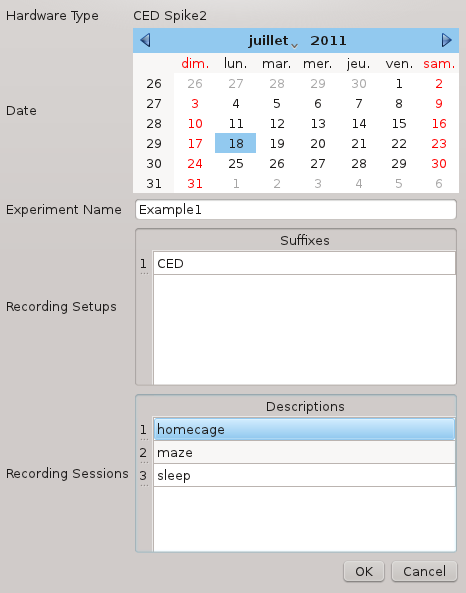
The Recording Setups entry is an arbitrary suffix that will be used to separate the original and processed files (see below). Here we choose CED. A more advanced use case will be presented in Example 2.
Click . In the next dialog, you can check and confirm the information you provided before the files are actually renamed:

Click . You are now presented with a list that is intended to help you find missing files:
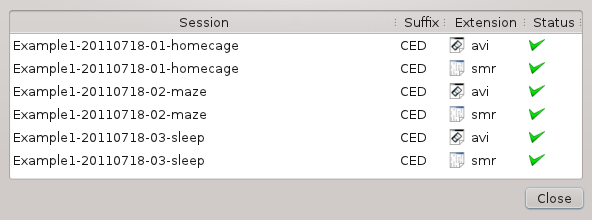
Had a file been missing, e.g. the video for the sleep session, a red cross would have appeared next to its name (see Example 2).
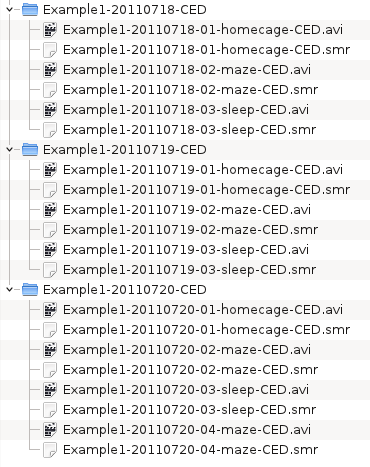
Prepare the other two directories. Your data files should now look like:
Open NDManager. To create a custom template parameter file from a standard template, select -> and select Template-8-tetrodes-20000Hz.xml in /usr/share/ndmanager/templates/. In the General page, enter the name of the experimenter(s) and a description of the experiment (ignore the date and notes). In the Acquisition System page, change the sampling rate (19531.25). In the Video page, enter the sampling rate (25), width (320) and height (240).
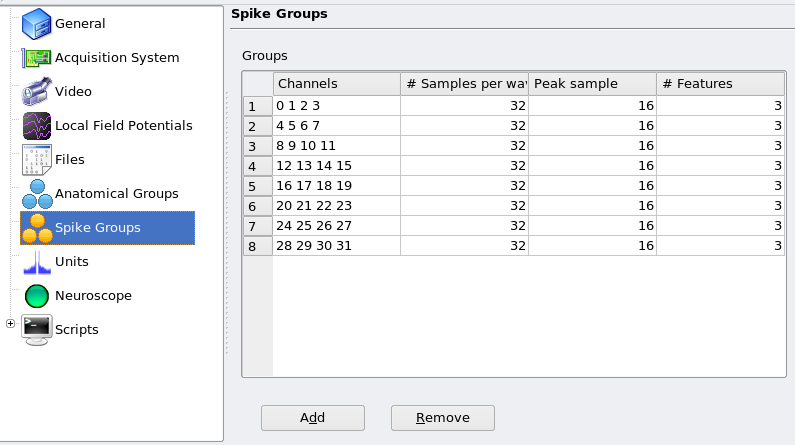
The Anatomical Groups and Spike Groups pages are already filled. Each line lists the channels belonging to the corresponding tetrode: 0 1 2 3 for line 1, 4 5 6 7 for line 2... 28 29 30 31 for line 8 (note that channels are numbered from 0). Also indicated are the number of samples per waveform to extract from the wideband data (32 is appropriate for approximately 20 kHz), the location of the peak sample (16, i.e. at the center), and the number of features per channel for the PCA (in practice, a value of 3 is appropriate for a tetrode).
Now go to the Scripts page, click and load all the script descriptions located in /usr/share/ndmanager/descriptions/ (not all of them are relevant here, but you can safely load and ignore them). The scripts are now listed under the Scripts entry. Select them one by one and set the parameter values to suit your needs. Use the Help tabs to get information about the meaning of each parameter. In many cases, default values are provided.
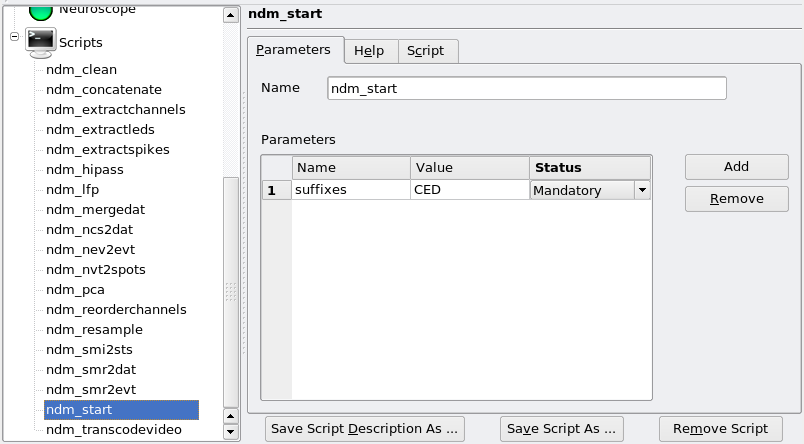
One special (and recurring) parameter deserves special attention: suffixes. This is the suffix that was provided when the data files were prepared, in Recording Setups. In this example, the suffix is CED. For instance, here is the page for ndm_start:
Save the file as e.g. 8-tetrodes.xml next to your data directories, and quit.
Now open a terminal, cd to the directory where your data is located, and type:
ndm_start 8-tetrodes.xml Example1-20110718 Example1-20110719 Example1-20110720and let NDManager automatically process all your data. Here is a brief extract of the output messages:

... and here is a second extract:

Would you like to make a comment or contribute an update to this page?
Send feedback to the KDE Docs Team